Christmas Paper Lantern File for Cutting: A Practical Guide to Flawless Holiday Decor
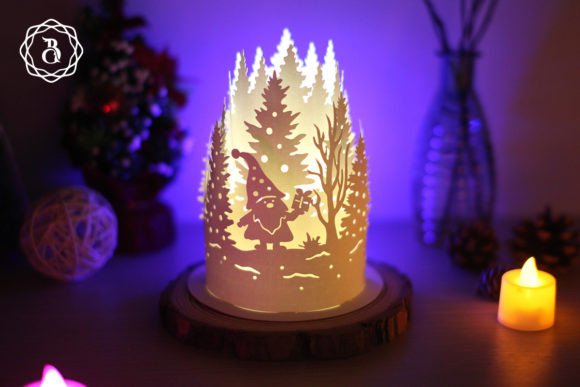
There is a distinct magic in the glow of a handcrafted lantern during the winter holidays. It transforms a simple room into a warm, inviting sanctuary. However, the difference between a professional-looking centerpiece and a frustrating craft project often comes down to preparation and file selection. When you decide to create a Christmas Paper Lantern, relying on a high-quality file for cutting is not just a convenience; it is the foundation of your project’s success. Many enthusiasts dive into this hobby with enthusiasm but stumble over technical details that could have been easily avoided with the right guidance.
Understanding the Project Scope and Material Needs
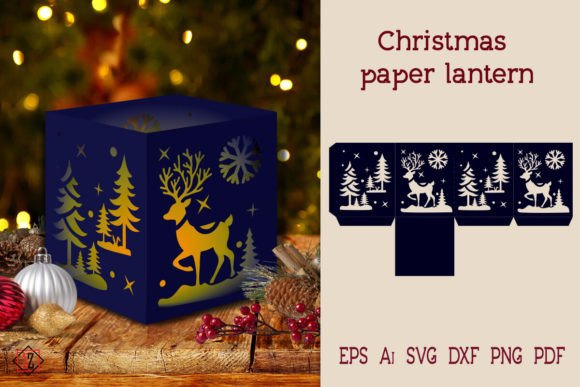
Before you send a design to your cutter or pick up a craft knife, it is essential to understand the physical requirements of the specific template you are using. This particular Christmas candlestick stencil is designed for precision. The finished lantern stands approximately 12 cm tall, making it an ideal size for table centerpieces, mantel displays, or window sills. It is substantial enough to make a visual impact but compact enough to fit into cozy corners of your home.
A common oversight among beginners is ignoring the paper size recommendation. This stencil is optimized for an A3 sheet of paper. Attempting to force this design onto a standard A4 or Letter-sized sheet will result in a distorted image or a lantern that is too small to hold a light source effectively. Conversely, if you wish to create a larger statement piece, you can scale the design up. The key is to maintain the aspect ratio to ensure the structural integrity of the paper cuts remains intact. Always check your printer or cutter settings to ensure "fit to page" is disabled if you are aiming for specific dimensions.
The Critical Importance of File Formats
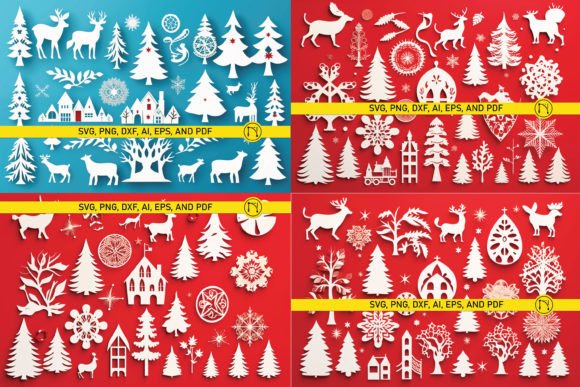
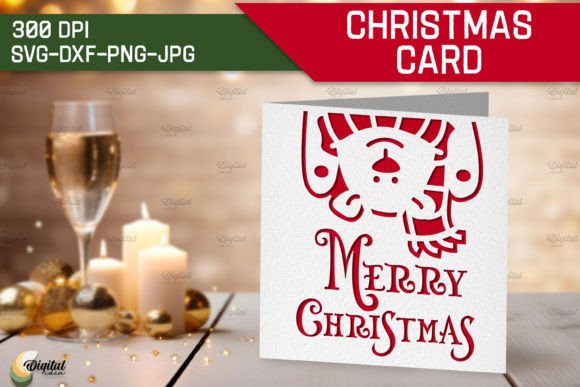
One of the most significant mistakes creators make is downloading a single file format without considering their specific tools. Whether you are using a professional plotter, a desktop die-cutting machine, or printing by hand, the file type matters immensely. A robust digital product should offer versatility. In this case, the ZIP folder provides a comprehensive suite of formats: AI, EPS, SVG, DXF, PDF, and PNG.
- SVG and DXF: These are vector formats essential for electronic cutting machines like Cricut or Silhouette. They allow the machine to read the cut lines precisely, ensuring clean edges without jagged pixels.
- AI and EPS: Ideal for professional designers using Adobe Illustrator or CorelDRAW. These files allow for easy editing of individual elements if you wish to customize the design further.
- PDF: Perfect for those who prefer traditional paper cutting handicrafts with your own hands. You can print this directly onto cardstock and cut along the printed lines.
- PNG: Provided with a transparent background at 300 dpi, this is useful for digital mockups or sublimation printing, though less ideal for precise cutting.
Choosing the wrong format can lead to poor quality cuts, wasted material, and unnecessary frustration. For instance, trying to use a raster image (like a low-resolution JPEG) for a vector cutter will result in the machine attempting to cut every pixel, ruining both the blade and the paper. Always verify that you have the correct file for your hardware before beginning.
Safety and Lighting: Avoiding Common Hazards
While the aesthetic appeal of a paper lantern is undeniable, safety is paramount. A frequent and dangerous misconception is that any light source can be placed inside a paper structure. Never use real flame candles inside these lanterns. Paper is highly flammable, and the heat generated by a real candle can cause the paper to discolor, warp, or even ignite.
The correct and safe approach is to use LED candles. Modern LED tea lights or pillar candles provide a realistic flicker effect without the heat risk. They are battery-operated, cool to the touch, and can be left on for extended periods without worry. This small adjustment ensures that your holiday decor remains a source of joy rather than a fire hazard. Additionally, LED lights often come in various color temperatures; a warm white LED will enhance the cozy, traditional feel of the Christmas interior, while a cool white might feel too stark against the intricate paper cuts.
Execution Tips for Clean Results
Even with the perfect file, the execution phase requires attention to detail. If you are cutting by hand, invest in a sharp, high-quality craft knife and a self-healing cutting mat. Dull blades tear paper rather than slicing it, leading to frayed edges that detract from the lantern's elegance. Change your blade frequently, especially when dealing with intricate sections of the Christmas candlestick stencil.
For those using electronic cutters, perform a test cut on a scrap piece of the same paper stock. Paper thickness varies significantly between brands. A setting that works for standard cardstock may be too aggressive for delicate tissue paper or too weak for heavy cover stock. Adjusting the pressure and speed settings based on a test run can save your main project from being ruined.
Assembly is another stage where errors often occur. Take your time to fold along the score lines before applying adhesive. Use a bone folder or a blunt tool to create crisp creases. When gluing, use a fine-tip applicator to apply small amounts of adhesive. Excess glue can seep out and stain the paper, creating visible marks that are difficult to remove. A dry-fit assembly—putting the lantern together without glue first—can help you visualize the final structure and identify any potential alignment issues.
Enhancing Your Holiday Interior
This lantern is more than just a craft project; it is a versatile decor element. Its 12 cm height makes it suitable for grouping. Consider creating three or five lanterns of varying sizes (by scaling the original file) to create a dynamic display on a dining table or entryway console. The interplay of light and shadow created by the cut-out patterns adds depth and texture to your room, enhancing the festive atmosphere without overwhelming the space.
Furthermore, this project is an excellent opportunity for personalization. You can experiment with different paper colors—traditional reds and greens, elegant golds and silvers, or even modern whites and blues. The transparency of the PNG files allows you to preview how different colors might look before committing to cutting. This flexibility ensures that the lantern complements your existing Christmas interior theme seamlessly.
Final Thoughts and Support
Creating your own holiday decor is a rewarding experience that combines creativity with tradition. By choosing a high-quality Christmas Paper Lantern file for cutting, you set yourself up for success. Remember to respect the material constraints, prioritize safety with LED lighting, and take your time during the assembly process. These small steps ensure that your final product is not only beautiful but also durable and safe.
If you encounter any issues with the files or have questions about the cutting process, do not hesitate to reach out. Good designers stand behind their products. As noted by the creator, Svetlana, customer support is available to assist with any queries. This level of support can be invaluable, especially for beginners navigating the nuances of digital crafting files. Thank you for visiting the store, and may your crafting journey be filled with creativity and joy.